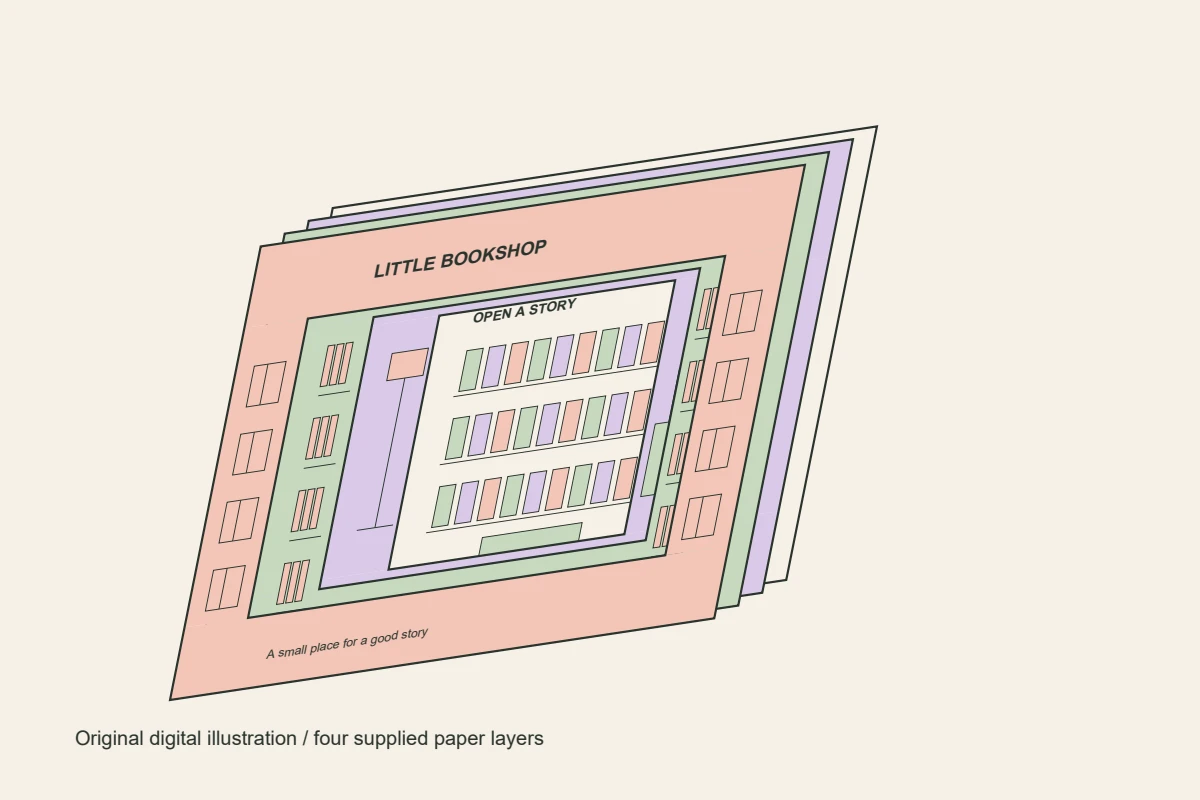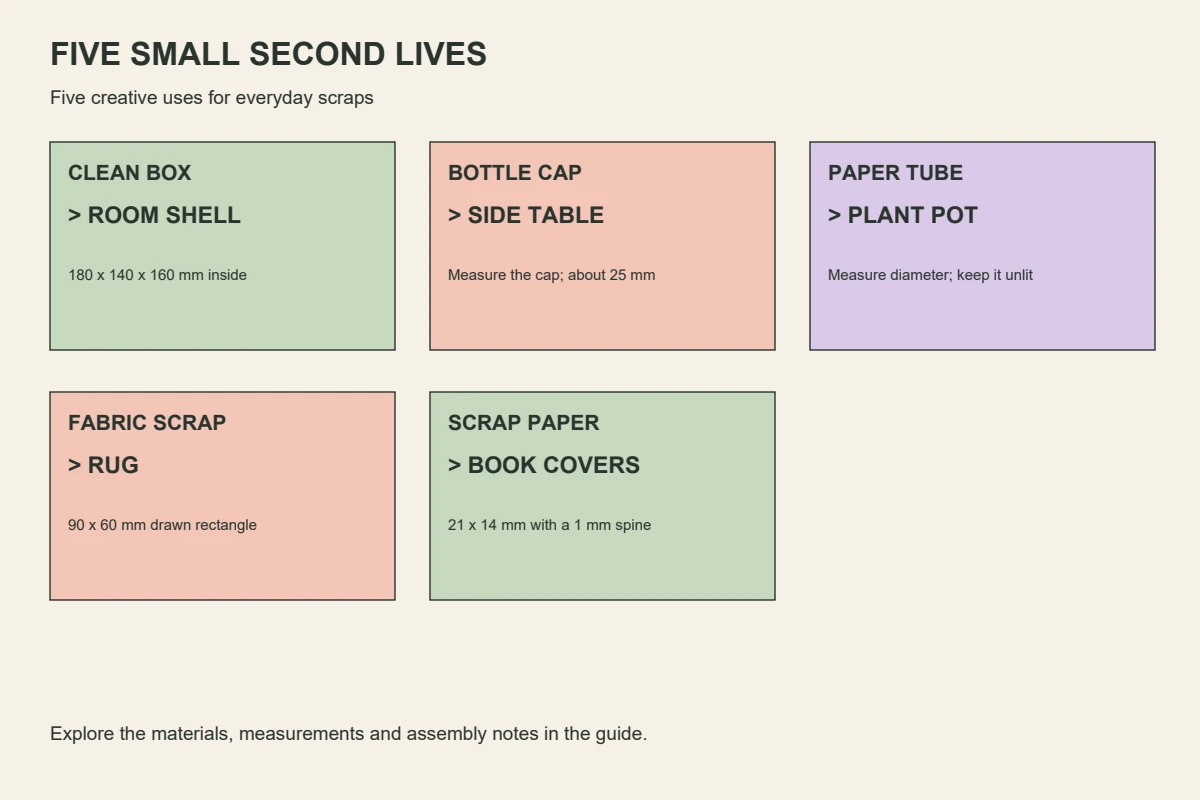
Choose the right card for each job.
The room shell
A clean corrugated box gives the room its walls. Measure inside the folds, including any double-thickness corners. Keep the flute direction intact where possible; avoid a crushed or bowed base. Its wall thickness is not the furniture thickness t.
The furniture
Use smooth stiff card, such as clean cereal-box card, for the small parts. Laminate flat sheets only if needed to approach the measured 1 mm thickness. Try the adhesive on an offcut and dry it under a flat protective weight. Soft corrugated scrap is a poor substitute for the 19 mm-wide shelf sides: its cut edges and compressibility change the fit.
Record your actual box dimensions and laminated thickness before tracing. The formulas describe the drawing; they do not compensate for crushing, paint, glue or a wavy cut.
Gather the materials
The aim is a decorative miniature scene, not a load-bearing piece of furniture. Keep the reclaimed materials clean and dry. Measure the card you actually use before tracing the furniture.
Checklist progress is saved only in this browser. No account is required. Clearing browser storage resets it.
An adult should handle craft-knife cuts. This model contains small loose parts and is not intended as a toy for young children. Use adhesive according to its label; keep the prototype free of flames, electrical components and batteries.
US size reference: a room at least 7.09 × 5.51 × 6.30 inches inside (180 × 140 × 160 mm). Inch values are rounded references; use the exact millimeter dimensions for cutting.
One room. A coherent scale.
This is a free-scale miniature design rather than a claimed standard dollhouse scale. The smallest intended box interior is 180 mm wide, 140 mm deep and 160 mm high. The furniture uses 1 mm card as a nominal starting point, with formulas for another measured thickness.
| Part | Cut size / quantity | Fit note |
|---|---|---|
| Box interior | At least 180 W × 140 D × 160 H | Measure your actual recovered box. |
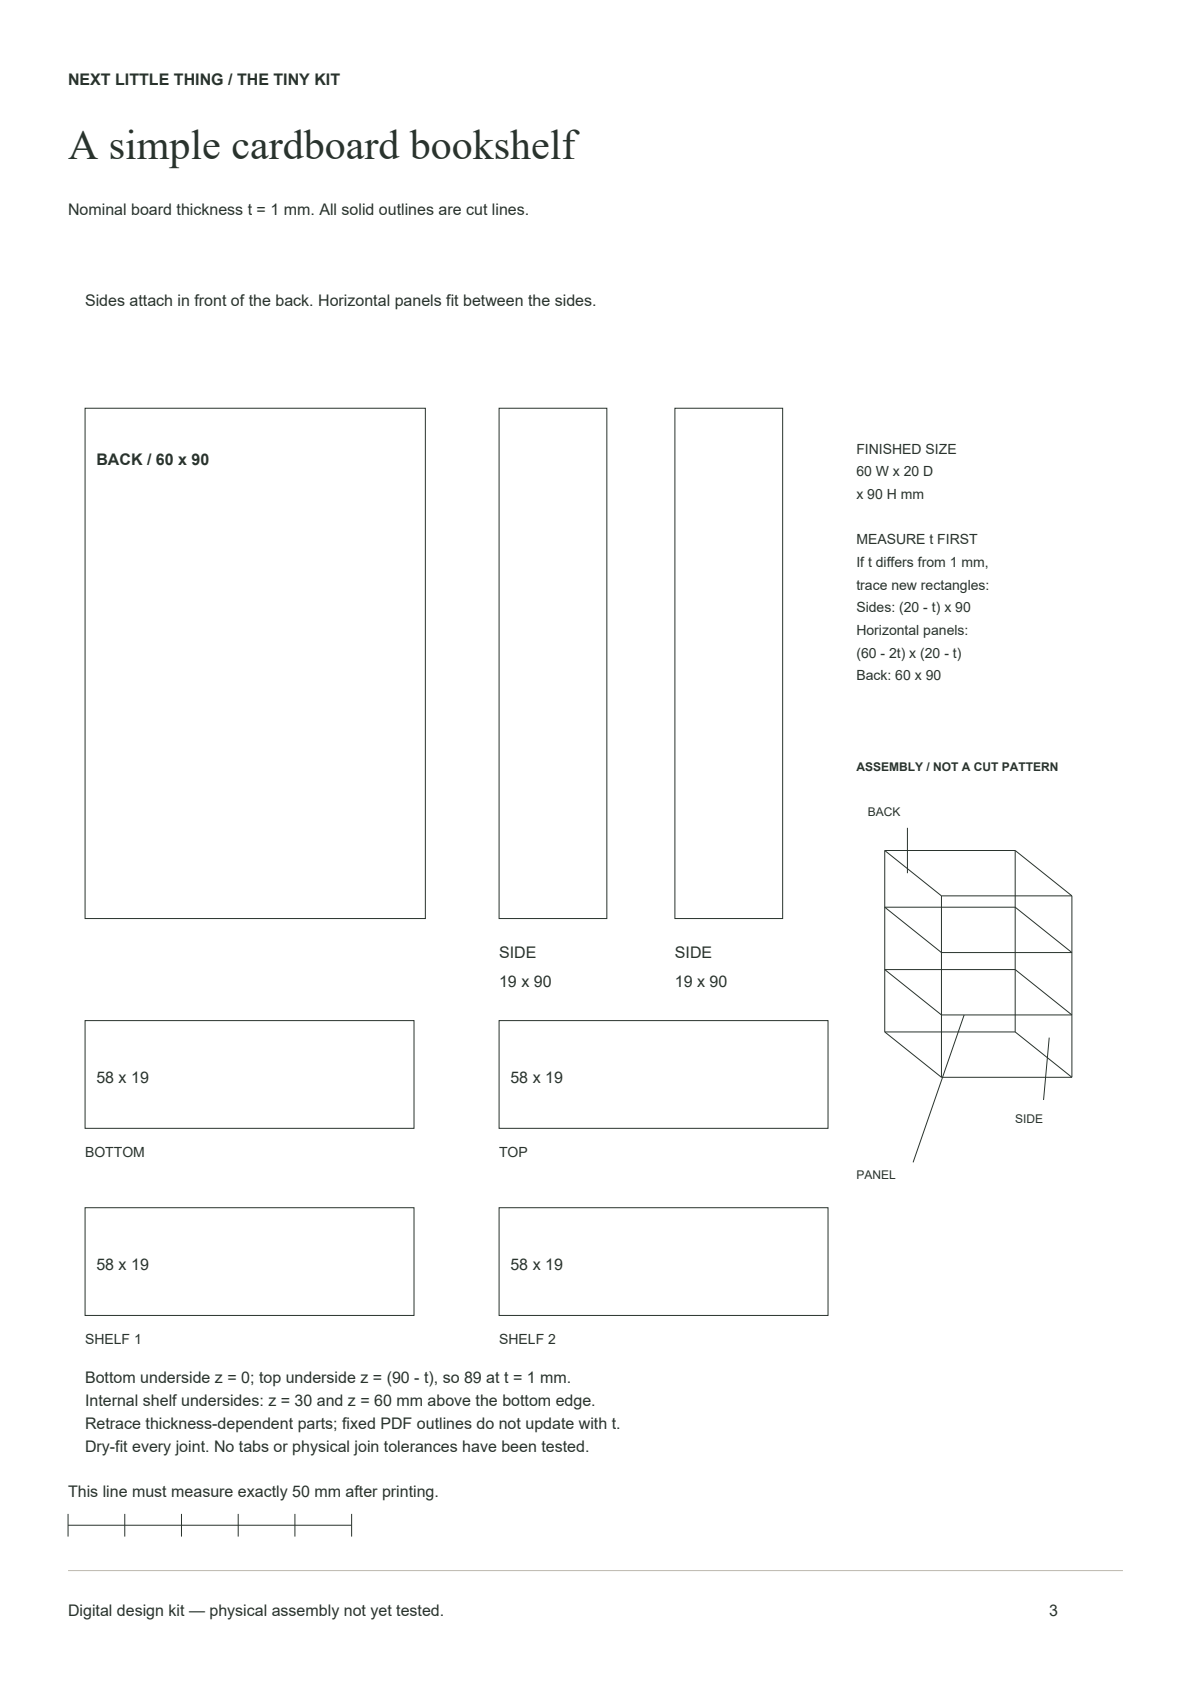
| Shelf back | 60 × 90 / one | Furniture board thickness t is measured first. |
| Shelf sides | 19 × 90 / two | For another thickness: (20 − t) × 90. |
| Shelf horizontal panels | 58 × 19 / four | Top, bottom and two internal shelves. General size: (60 − 2t) × (20 − t). |
| Chair base | 40 × 35 / layers to 25 mm high | Count depends on measured card thickness. |
| Chair back / arms | 40 × 70 / one; 35 × 40 / two | Nominal footprint 42 × 36. At thickness t: (40 + 2t) × (35 + t). |
| Book cover | 21 × 14 / twelve supplied | 10 mm back + 1 mm spine + 10 mm front. |
| Rug / wallpaper | 90 × 60; 180 × 160; 140 × 160 | Trim wallpaper to the real box. Print side panel twice. |
At 1 mm thickness the shelf is 60 × 20 × 90 mm and the chair is 42 × 36 × 70 mm. The shelf has 29 mm of clear height in its two lower compartments, so the 14 mm book covers fit on the drawing. Do not treat this calculation as a physical stability test.
A tiny kit, ready to print.
The Reading Nook A4 kit
Eight pages: an overview and material list; a floor plan; shelf outlines; chair outlines; back wallpaper; side wallpaper; books, rug and plant shapes; a prototype checklist.
Download the eight-page PDF ↓Original resource for personal creative use. Print at 100% on A4. Measure the 50 mm check line on each pattern sheet before cutting.
Download the editable vector floor plan. It is a visual plan with dimensions, not a 1:1 cut sheet; use the PDF for tracing.
A look inside your free kit.
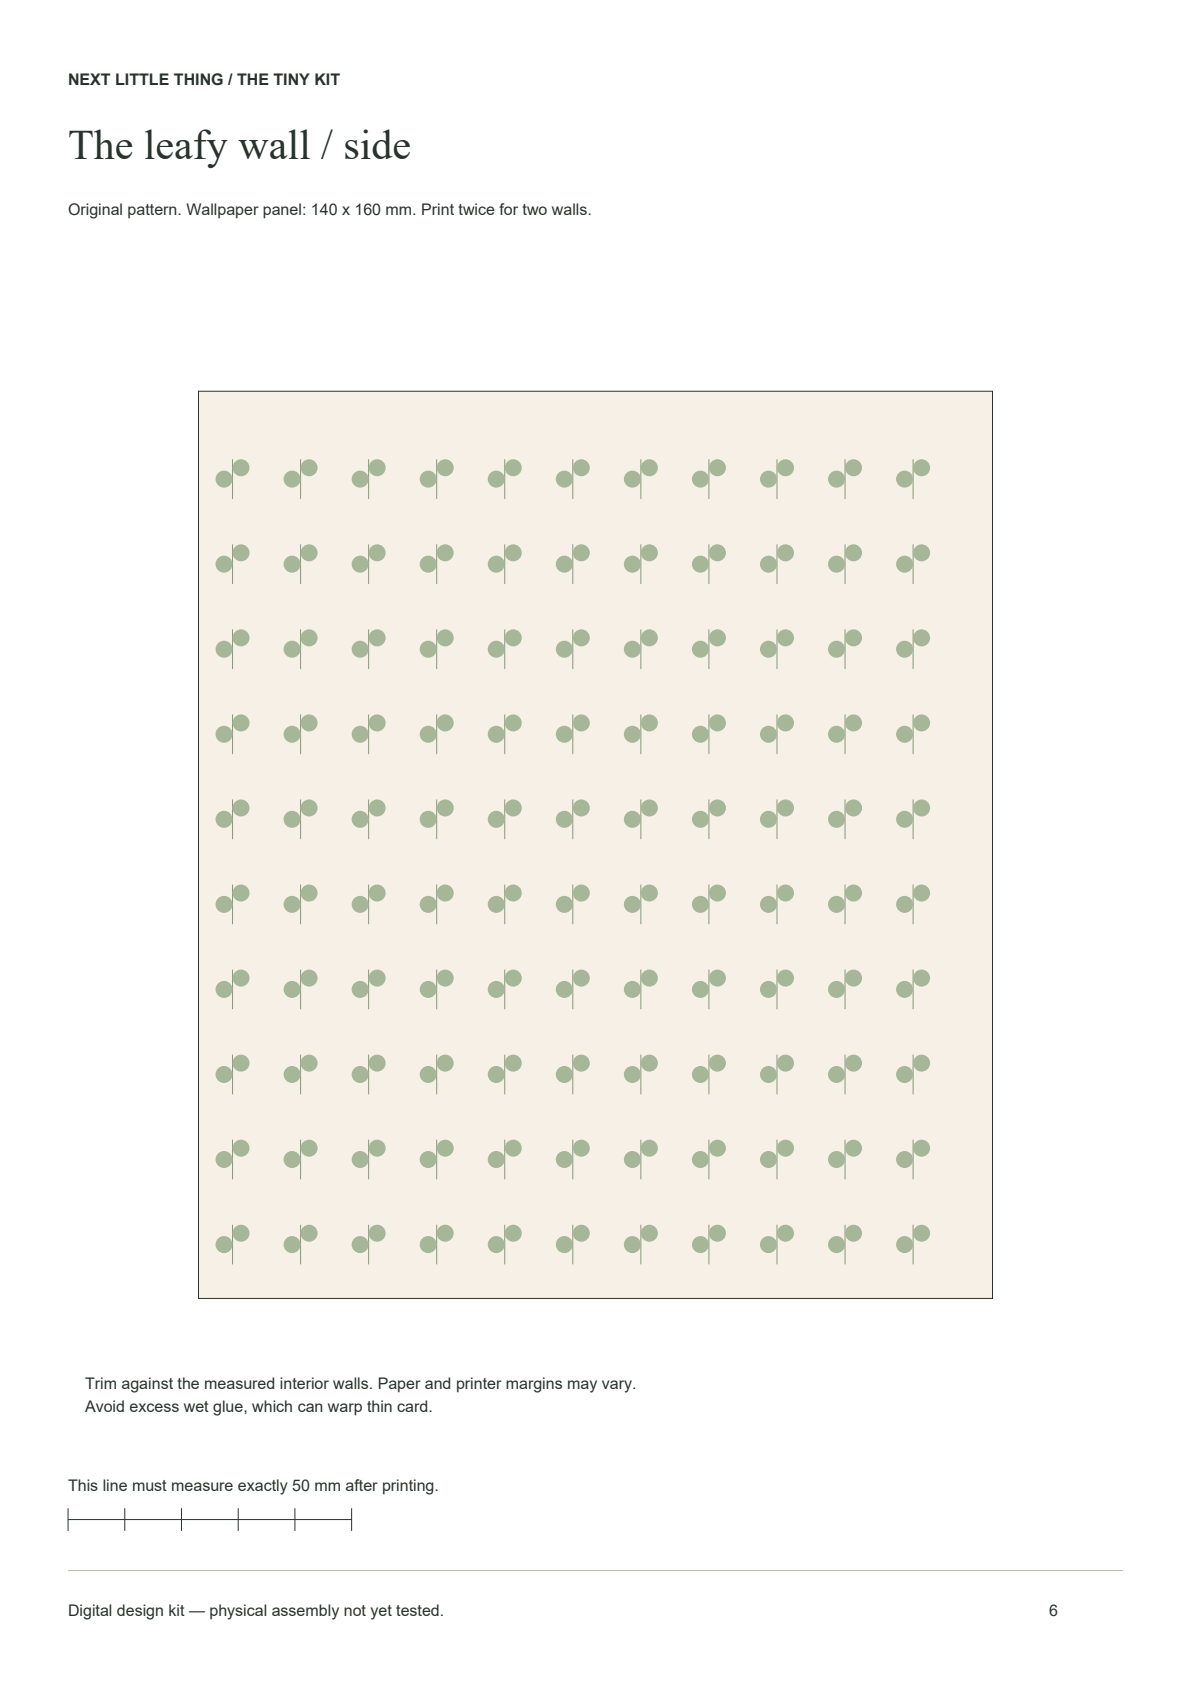
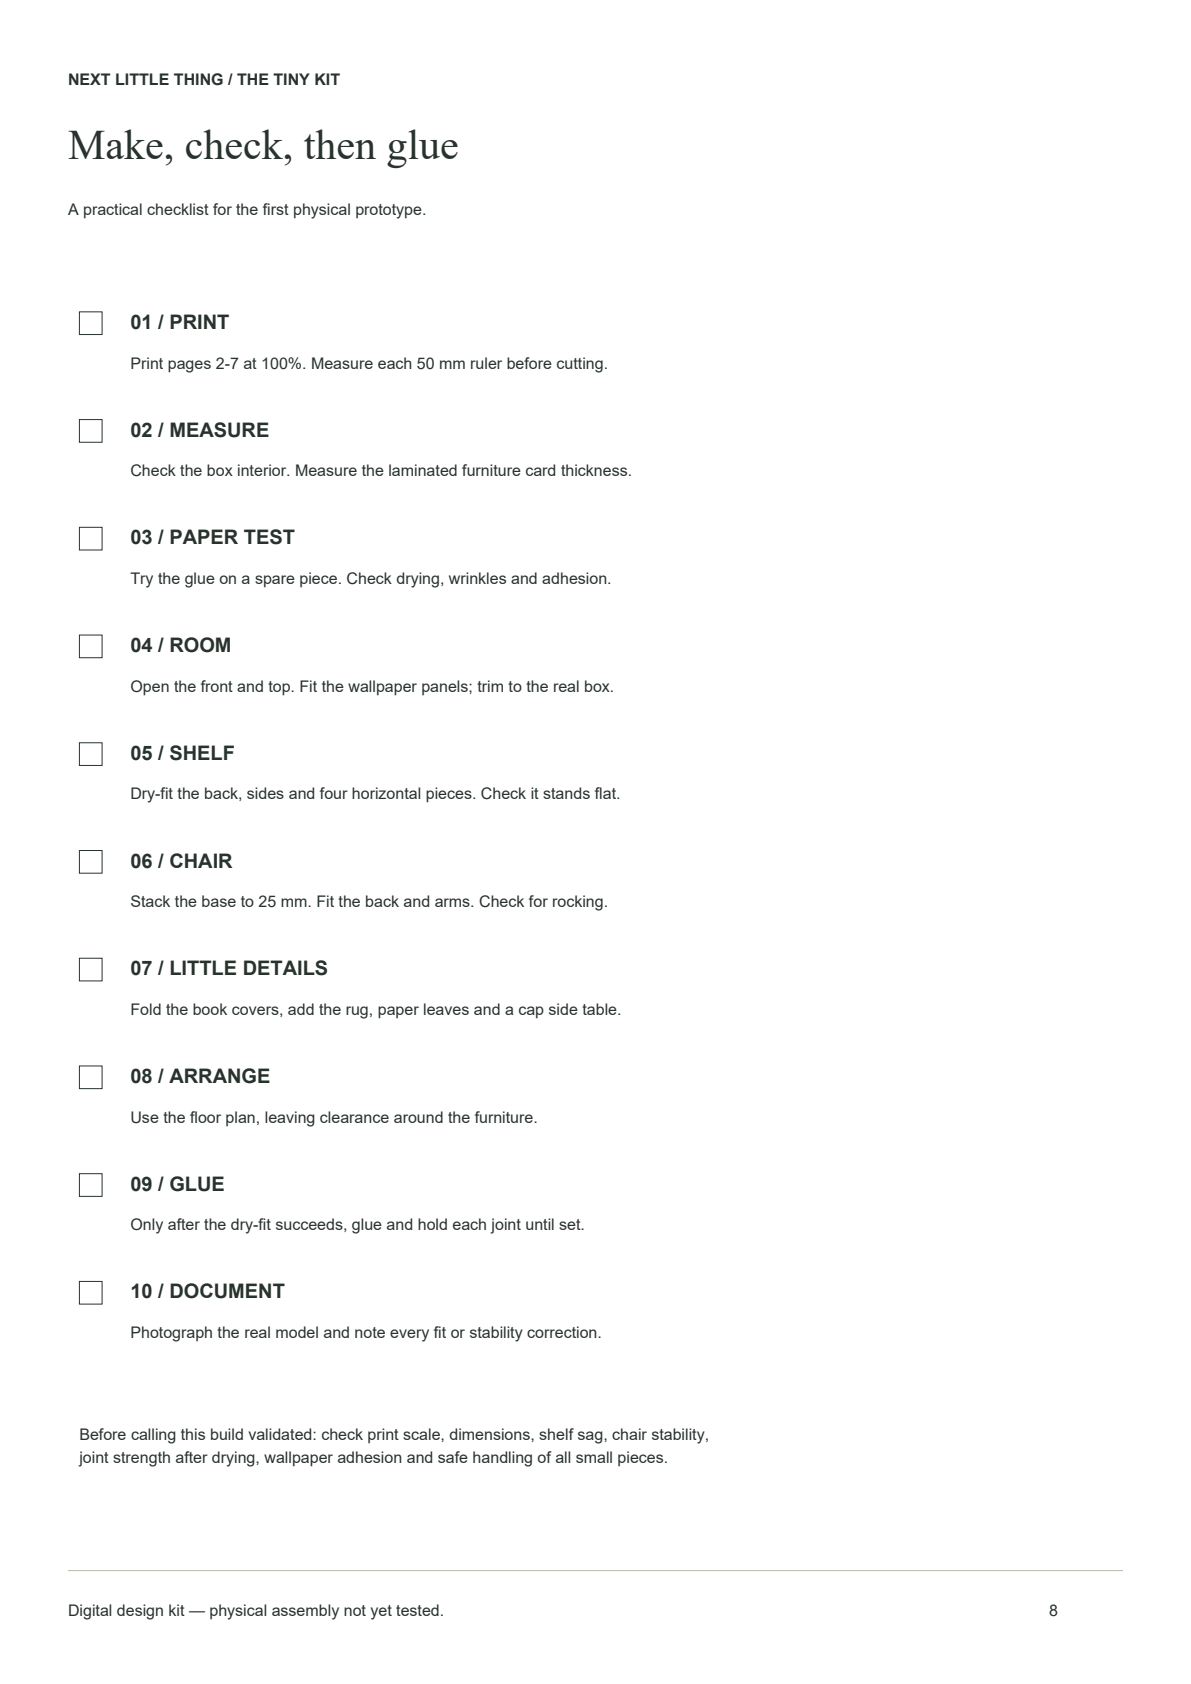
Three actual pages from the 8-page A4 kit.
Six labels that make the joints clear.
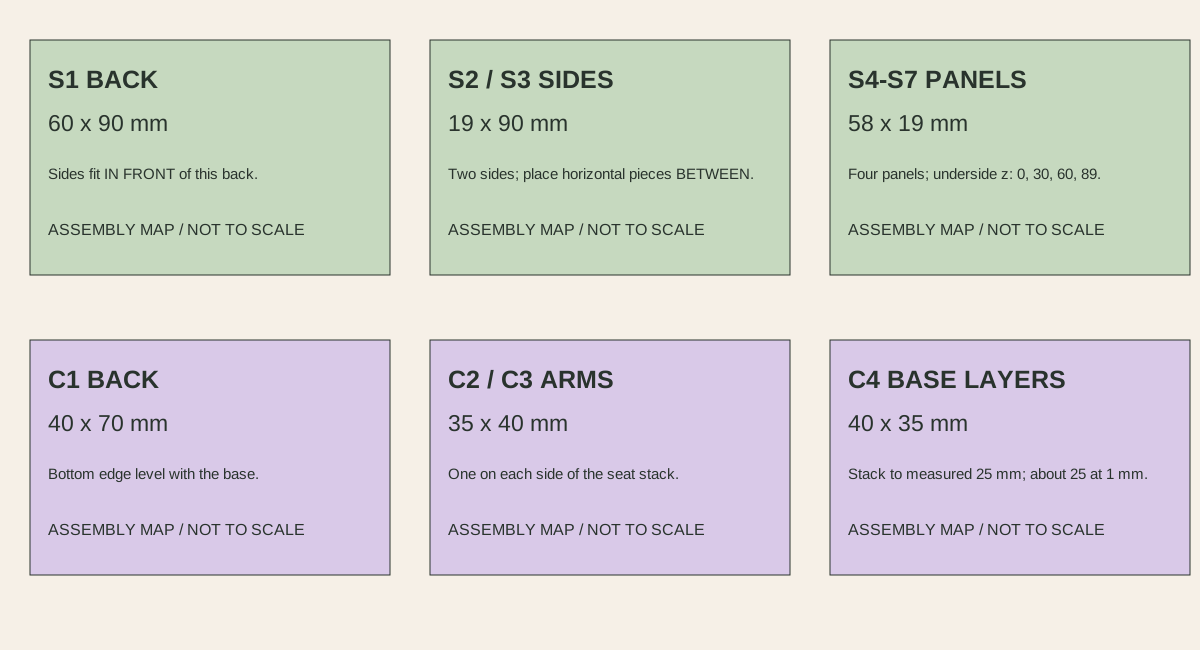
- Shelf: put S1 flat with its bottom edge marked. S2 and S3 sit in front of it. S4 is the bottom panel, S5 the top, S6 and S7 the inner shelves. All four fit between the sides. At t=1 mm, the undersides are z=0, 89, 30 and 60 mm respectively.
- Chair: build C4 to the measured 25 mm seat height. C1 goes behind the stack, with bottom edges level. C2 and C3 attach along the two sides, also bottom-aligned. The 40 mm arm height leaves about 15 mm above the uncushioned seat at the nominal height.
- Pause before glue: hold the pieces in their intended positions. A panel that bows or a chair that rocks calls for a new fit check, not extra adhesive to hide the mismatch.
Make the little room.
Work in this order so the real box, printer and materials determine the fit. Pause at each dry-fit before committing to glue.
Choose the box, then measure it
Pick a clean box with an internal width of at least 180 mm, depth of 140 mm and height of 160 mm. Keep a sturdy base, back and two side walls. The front and top need to stay open so you can reach the furniture. If a cut is needed, mark it with a ruler first; an adult should handle a craft knife on a cutting mat. A larger box works too: keep the furniture dimensions and leave more empty space.
Measure inside the walls, not across the outside of the box.
Check the printed scale
Print the kit on A4 at Actual size or 100%, with Fit to page turned off. Measure the 50 mm line on each pattern sheet with a physical ruler. If it is not 50 mm, correct the print setting before tracing anything. The on-screen drawing is not a substitute for this print check.
The PDF geometry is checked; your printer output is still untested.
Paper the little room
Try a small wallpaper scrap on spare box card with the glue you intend to use. Let it dry according to the product label, then check for wrinkles and lifting. Only after that test, trim the back panel to the measured wall and add the side panels. Use a thin glue layer rather than soaking the card.
Print the side-wall page twice if you want both walls patterned.
Build the bookshelf
Measure the thickness t of your laminated furniture card. The full-size outlines use t = 1 mm. If yours differs, redraw the sides at (20 − t) × 90 mm and all four horizontal panels at (60 − 2t) × (20 − t) mm. The 60 × 90 mm back stays the same. Place the sides in front of the back, with the horizontal pieces between them. In PDF page 3, the connection sketch labels BACK, SIDE and PANEL; it is a placement guide, not a cut pattern. The top underside moves to z = (90 − t) when thickness changes; the inner shelf undersides remain at z = 30 and 60. Retrace each thickness-dependent rectangle at its new size. Do not resize the PDF or assume the fixed outlines update automatically. Dry-fit the bottom at z = 0, the top at z = 89 for 1 mm card, and internal shelf undersides at z = 30 and 60.
Do not force a panel into place. Check the cut, thickness and glue clearance first.
Make a compact armchair
Trace the 40 × 35 mm base rectangle onto enough layers of scrap card to reach a measured 25 mm height. At 1 mm per layer, start with about 25 layers before accounting for adhesive; at 0.5 mm, about 50. At 2 mm, 12 layers make 24 mm before glue, so measure and adjust the final layer rather than assuming a whole-layer count fits. Measure the stack after gluing and drying; keep the edges aligned. Dry-fit the 40 × 70 mm back behind the base, with bottom edges level, then fit the two 35 × 40 mm arms to the sides. At 1 mm thickness the footprint is 42 × 36 mm. Add a thin fabric or folded-paper cushion only after the chair stands without rocking.
The active drawing identifies the measured pieces. Use the PDF outlines for tracing and check the fit with your own card.
Fold a shelf of tiny books
Cut a 21 × 14 mm cover and score the two fold lines lightly using a blunt tool. The middle 1 mm strip is the spine. Wrap the cover around a 10 × 14 × 1 mm paper block, or leave it as a decorative folded prop. Start with a few books; avoid loading the shelf with heavy objects.
Change cover colors with scrap paper. Keep one book size for a calm rhythm.
Add the rug, plant and side table
Cut the included 90 × 60 mm paper rug, or trace that rectangle onto a fabric scrap. For a plant, fold the paper leaf shapes along their length and attach them to rolled-paper stems in a rolled-card pot. For a table, use a clean cap around 25 mm across over a short rolled-card support. Check the support stands flat and holds the empty cap.
This version uses no working lights, flames, electrical parts or batteries.
Arrange everything before gluing
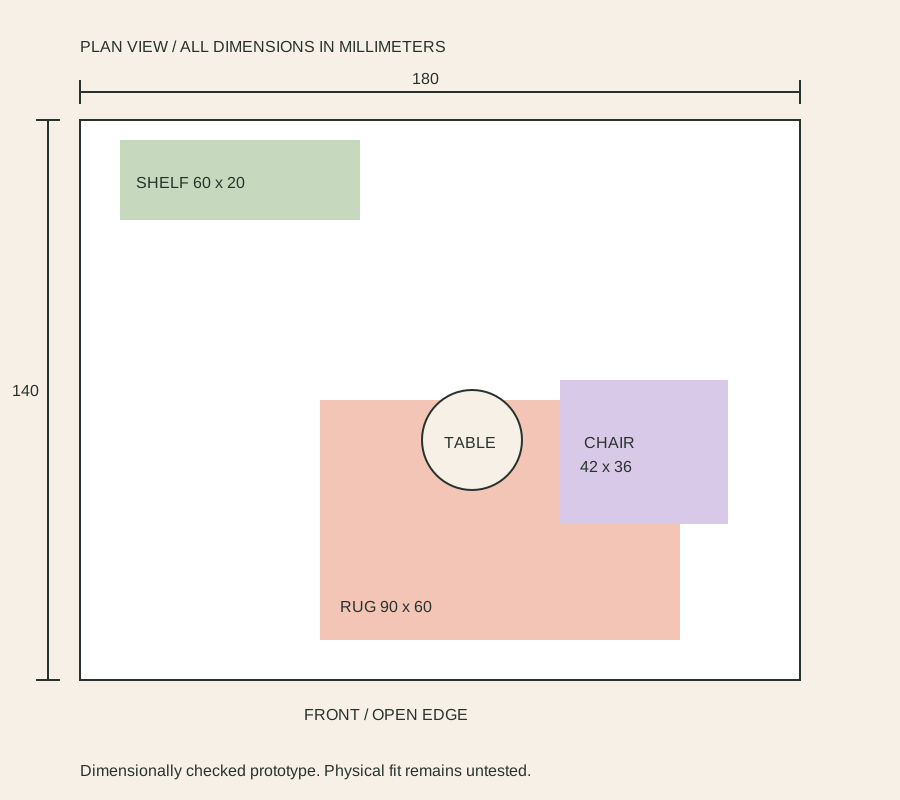
Follow the plan with x measured from the left interior wall and y from the back. Put the shelf at (10, 5), the chair at (120, 65), and the table center at (98, 80). Place the rug at (60, 70); it deliberately runs under part of the chair. Keep the shelf and chair separate. Move the small paper plant wherever it stands securely without crowding the scene.
These placements fit the drawing. A physical dry-fit is required for your materials.
Glue, let it settle, and record the result
After the dry-fit works, glue a few joints at a time and hold them with temporary tape if needed. Follow the adhesive label for drying. Check for sagging shelves, a rocking chair, lifting wallpaper and loose small parts. Photograph the real model and note any dimensions you changed. This is the evidence needed before calling the prototype a validated build.
Keep small parts and tools away from young children; this is a decorative model.
The first real-world check: six short steps.
- Print p2–7 at 100%; measure every 50 mm control line.
- Measure the card; dry-fit the shelf and chair.
- Test glue on a spare piece, then glue the prototype.
- Let it dry for the adhesive’s stated time.
- Check shelf sag, rocking, loose joints and wallpaper lifting.
- Photograph front, side and joints; record dimensions and changes.
This procedure has not been performed here. Keep the status “digital design prototype” until a real build and its results are recorded.
Keep the piece mapMake it feel like yours.
- The botanical corner: repeat the leafy paper on one wall and leave the other wall plain. Add two small paper plants, keeping their bases clear of the rug.
- The midnight library: change the wallpaper to dark scrap paper and use pale book covers for contrast. Leave the room unlit; do not add real candles or electrical components.
- The personal bookshelf: write initials or favorite book names onto blank scrap-paper covers. Keep the cover dimensions and avoid copying protected cover art for redistribution.
Change the surface finish first, then the layout. Changing the scale means recalculating every part, including board thickness; do not shrink the printed pages and assume the joints will still fit.
A few good questions.
Can I use a bigger box?
Yes. Keep the furniture dimensions and leave additional space around the scene. Measure and trim the wallpaper to your real box; the kit covers the stated panel area only.
Is this a tested tutorial?
No. It is a dimensionally checked design prototype. A physical model, print-scale check, joint and stability tests are still needed.
How should I use the chair drawing?
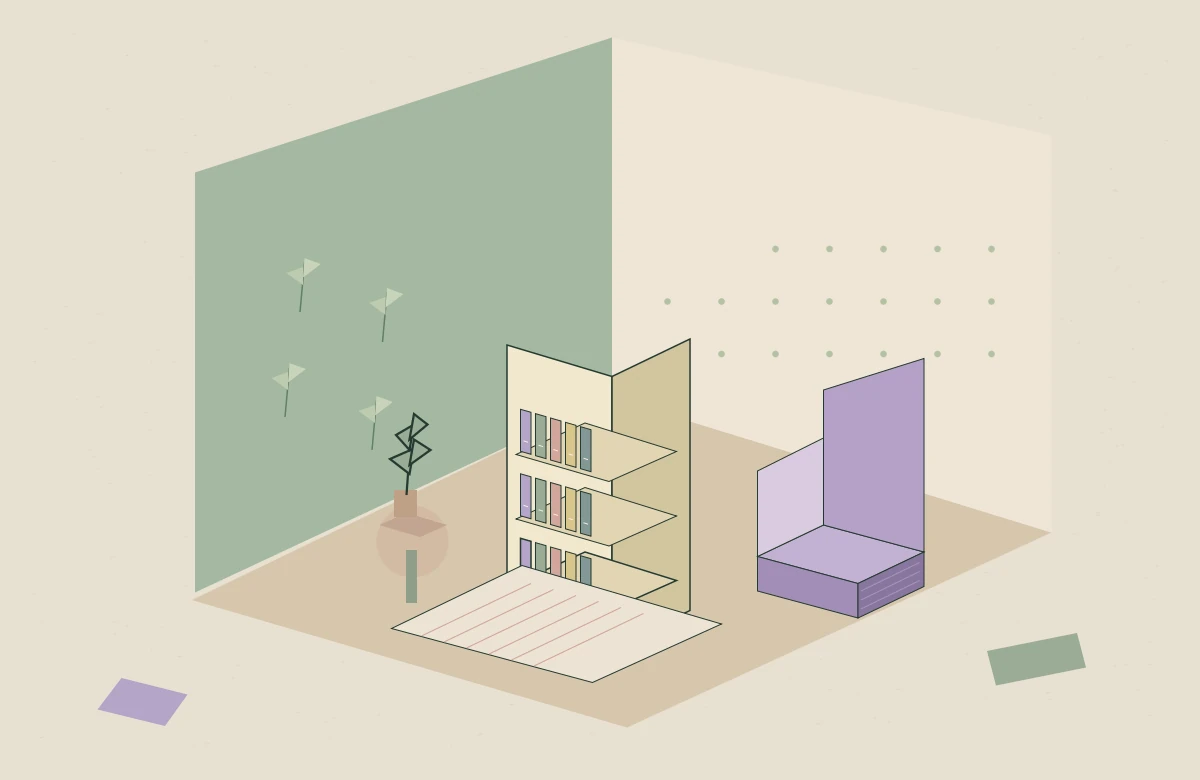
The lead illustration is an original digital scene based on the room and furniture. Decorative styling is not an additional cut template. It is a digital drawing; the piece map below names the assembly parts. Follow the PDF outlines and dry-fit with your real materials.
What if my card is not 1 mm thick?
Measure it and use the formulas in the dimensions table. The shelf widths and depths depend on thickness. The chair footprint changes too. Redraw those rectangles and dry-fit them.
Can I add a real light?
This first version excludes working lights and electrical parts. A future lighting variant would need its own safety and physical checks.
Do I need to sign up?
No. The PDF opens directly and the checklist stays in your browser. You can use the materials list without browser storage too.