Pick the paper size you actually use.
Each edition has five pages: overview, L1–L2, L3–L4, both side strips, and assembly. US Letter uses its own page size and layout; the pieces stay 120 × 100 mm. Ink-saving editions remove the colored fills while retaining every cut, score and label.
Four editions. No email gate.
Print at Actual size or 100%, with Fit to page off. Measure the 50 mm line on each pattern page. Read the assembly guide before cutting.
Download the original SVG source pack — L1–L4, a side strip, digital composite, geometry and a readme. SVGs use millimeters. For a straightforward printing workflow, use the PDF rather than a browser’s SVG print sizing.
Original Next Little Thing resources for personal creative use. Link to the project rather than reselling the files.
A look inside your free kit.
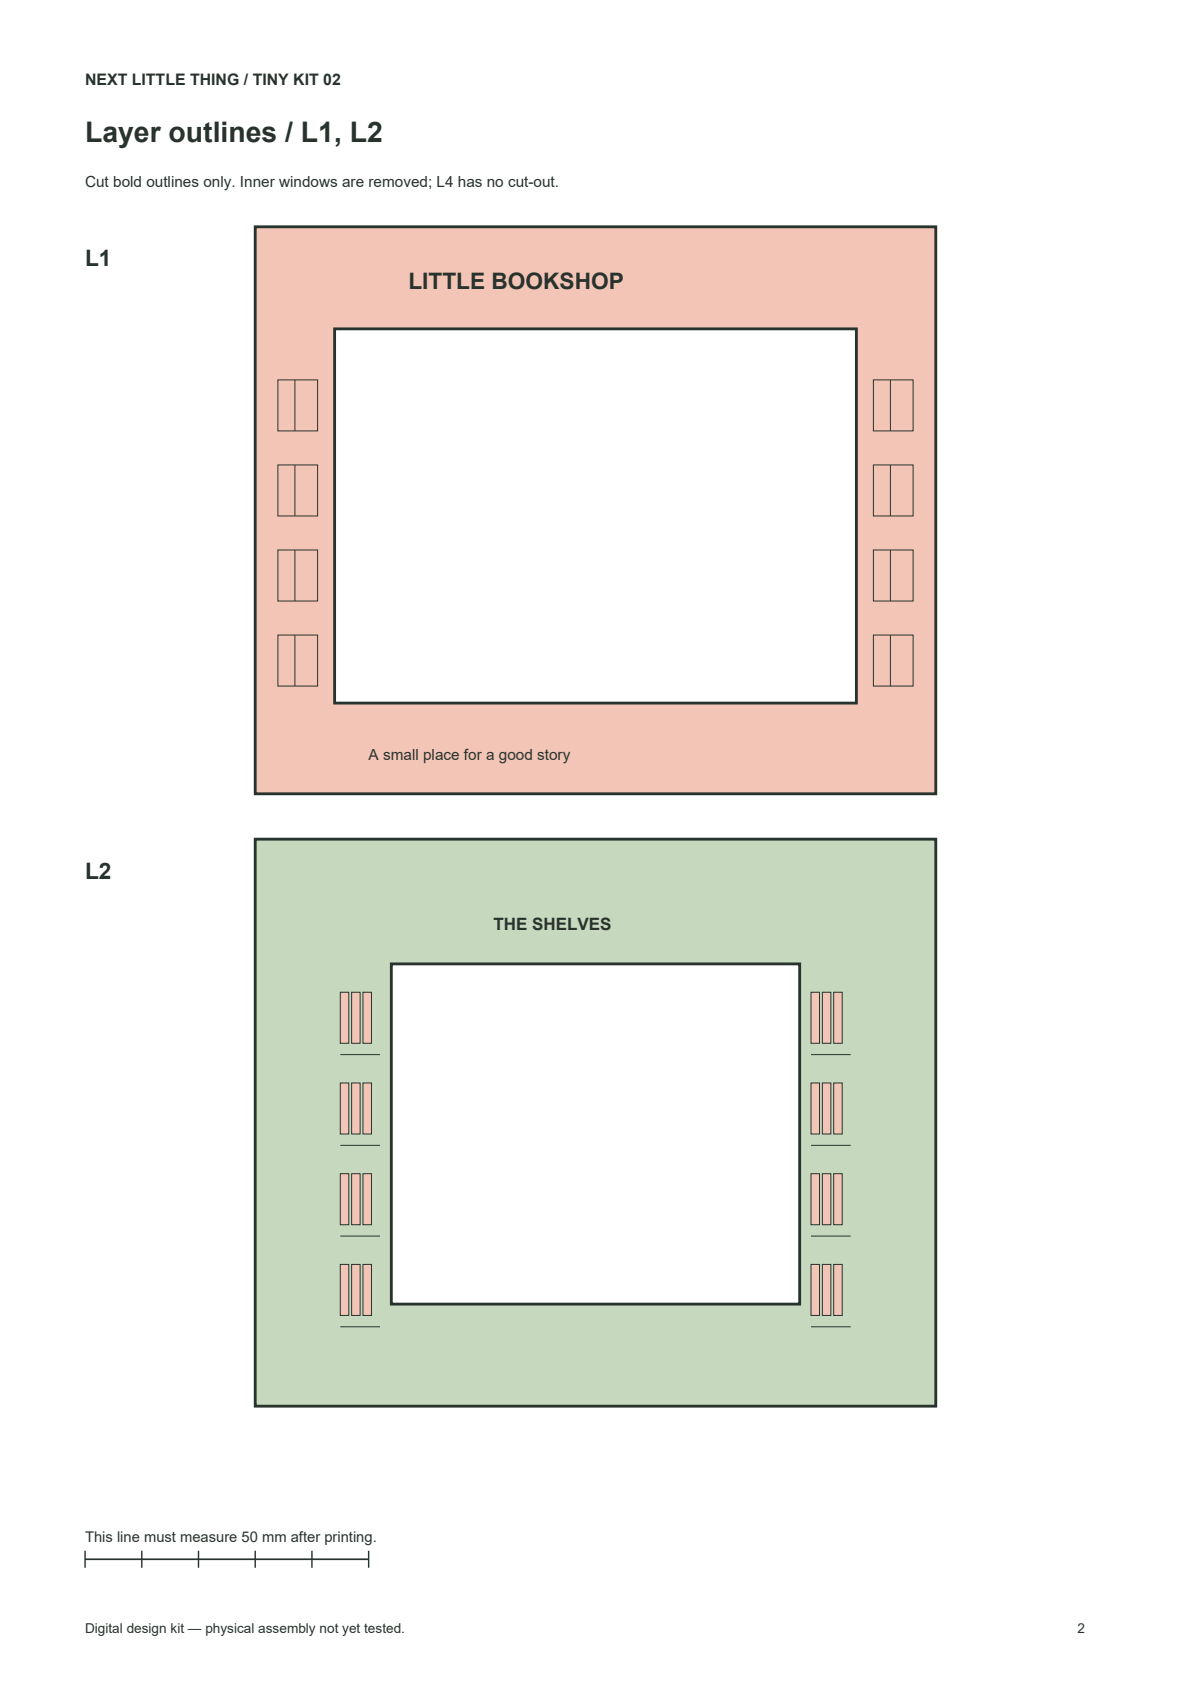
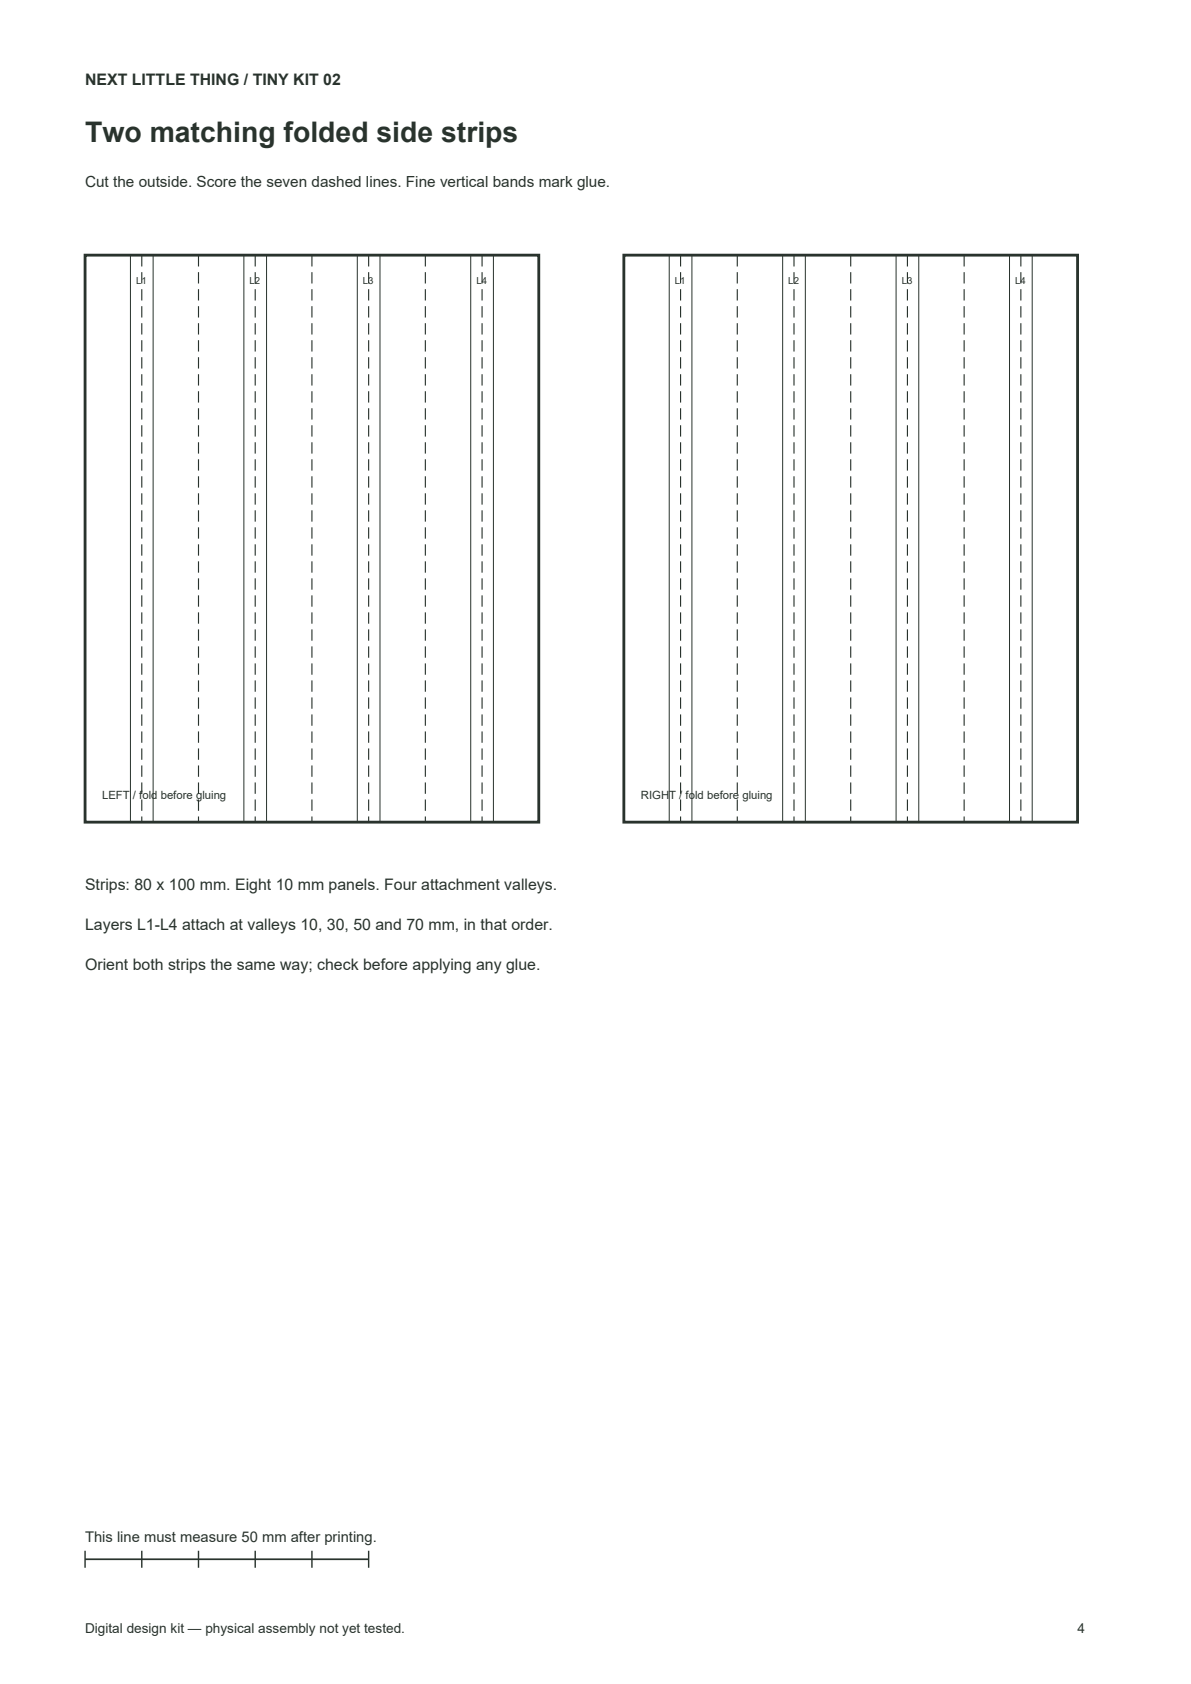
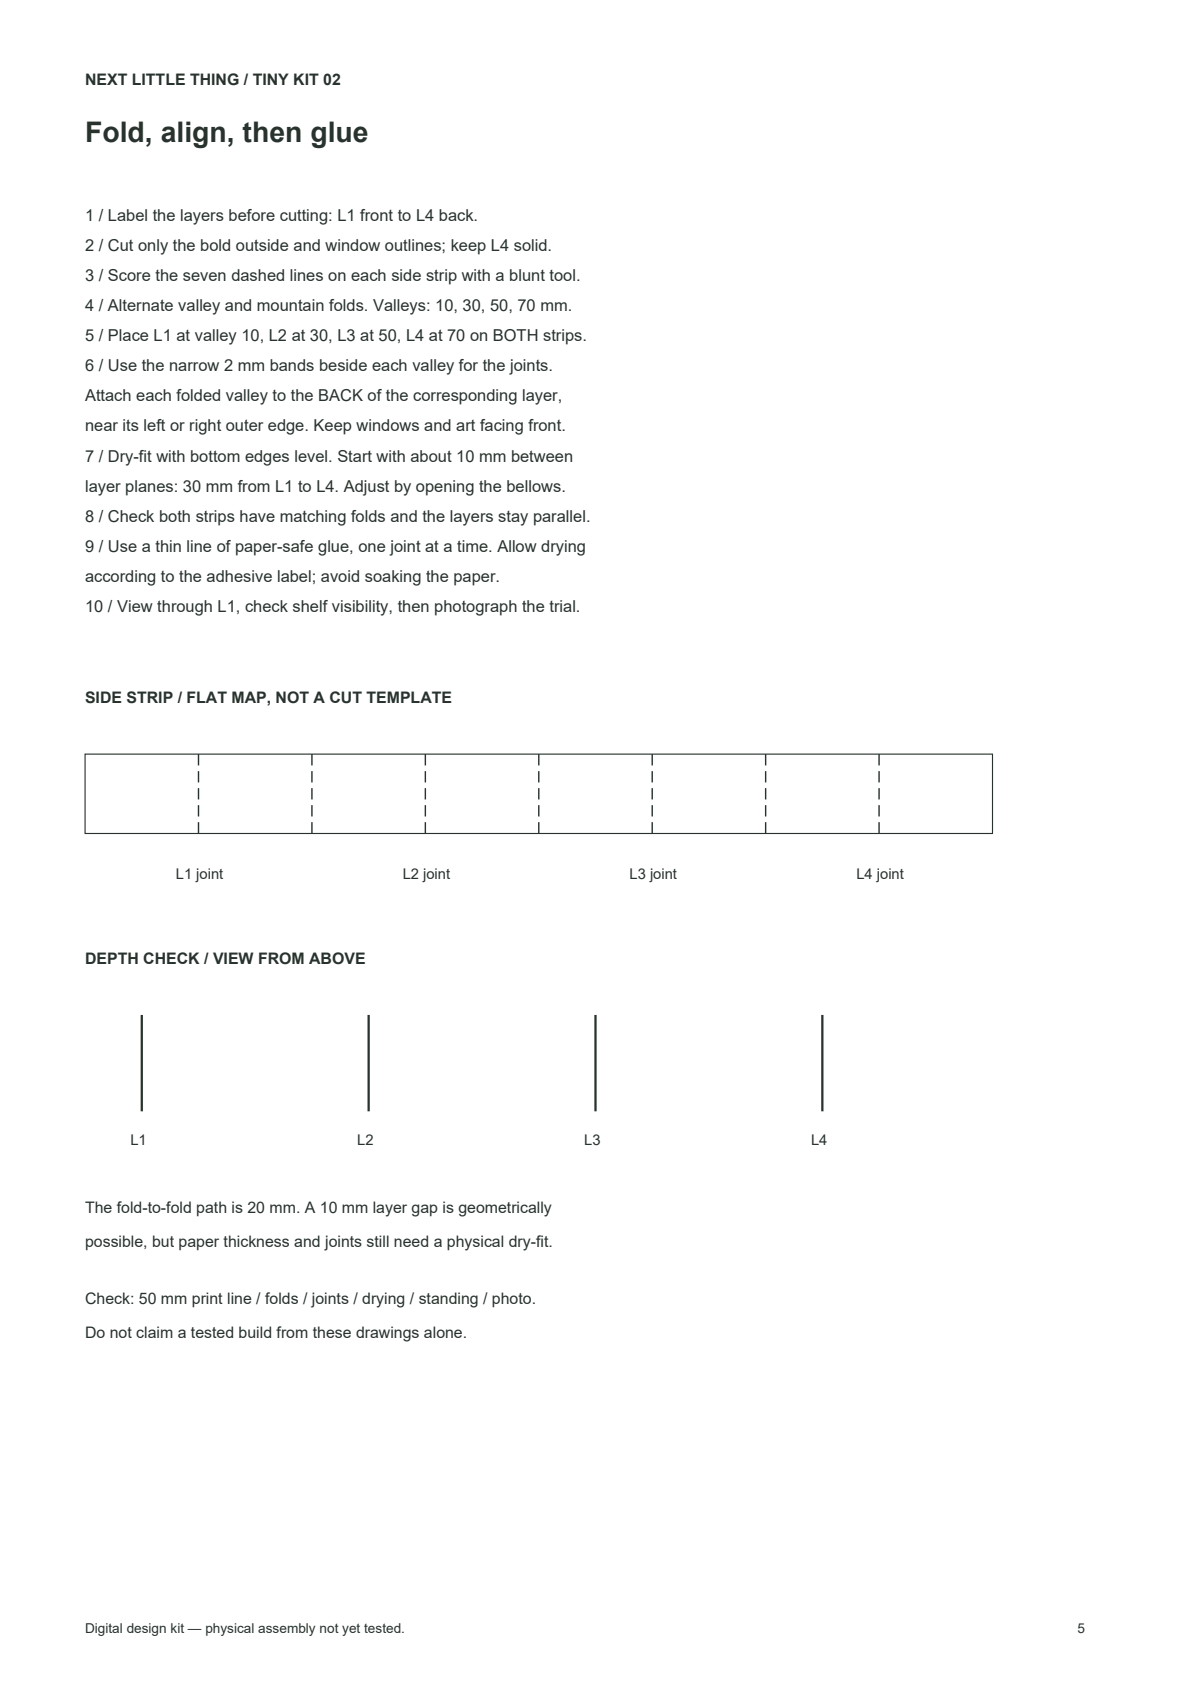
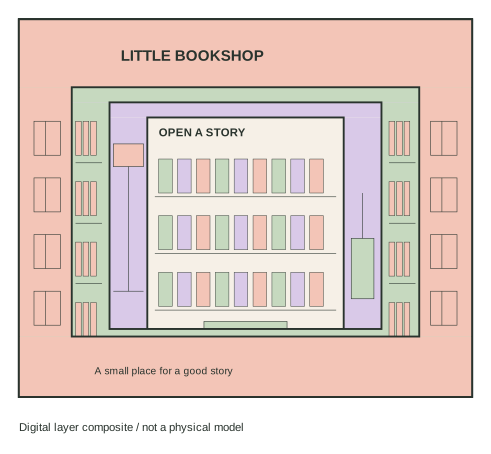
Three actual pages from the 5-page A4 color kit. The other editions keep their stated paper size.
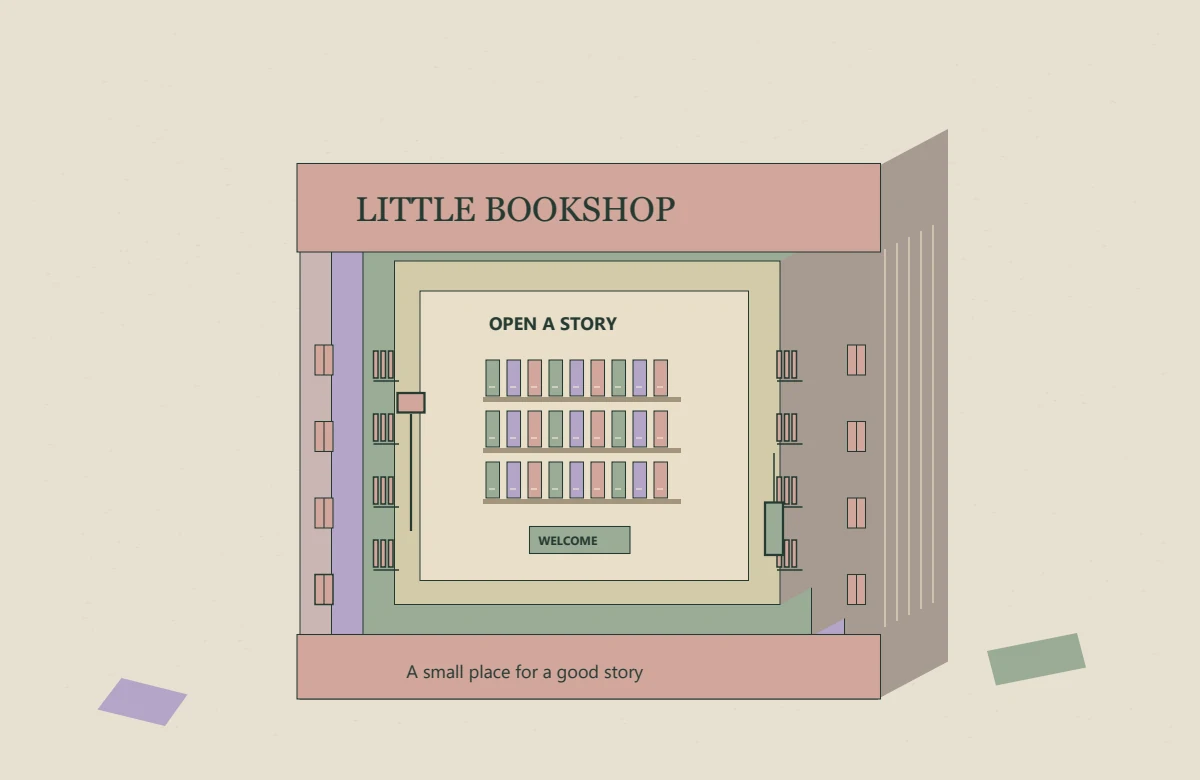
Paper that folds without hiding the picture.
- Four layer sheets and two side strips from the selected PDF. Start with 180–220 gsm paper or thin card; this stock range is a proposed starting point, not a tested specification.
- A ruler, pencil and blunt scoring tool. A rounded empty pen can mark a score; test it on scrap so it does not tear the paper.
- Scissors for the outside; an adult-handled craft knife and cutting mat for the three interior windows.
- A small amount of paper-safe glue, used according to its label. Temporary clips can help a dry-fit; do not crush the folds.
Thick board may resist the 10 mm bellows panels, while soft paper may sag. Cut and fold one spare panel before committing to the scene. Never add a flame, battery or working light to this version.
Four layers, four different jobs.
| Layer | Its role | Window to remove |
|---|---|---|
| L1 | Bookshop sign and widest front frame | 92 × 66, beginning at (14,18) |
| L2 | Bookcases at the sides | 72 × 60 at (24,22) |
| L3 | Lamp and plant beside the reading corner | 52 × 56 at (34,26) |
| L4 | Back shelves and welcome sign | No window; keep the sheet solid |
All outside rectangles are 120 × 100 mm. Coordinates start at the top left. Bold outside and window outlines are cuts; fine lines are artwork. Do not cut out individual drawn books. Mark L1–L4 on the backs before removing the windows.
Build depth into the two sides.
Print, measure, then cut
Choose A4 or Letter for your paper. Check the 50 mm line on pages 2–4. Label the four backs. Cut the bold outer rectangles and the windows in L1–L3; keep L4 solid. An adult should handle the inner cuts.
Score seven folds on each strip
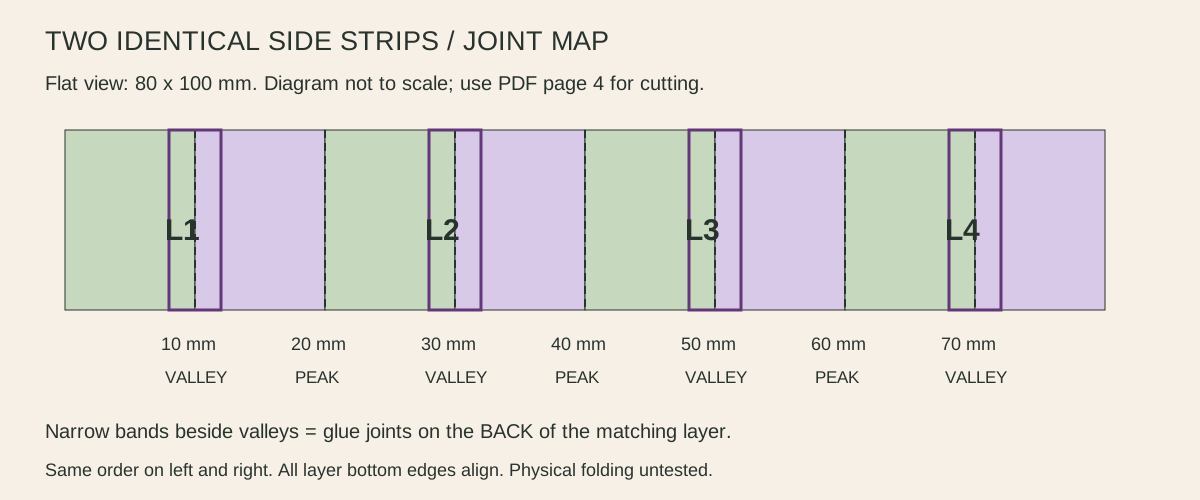
Each strip is 80 × 100 mm, with fold lines at x=10,20,30,40,50,60,70 mm. Score lightly on the dashed lines. With labels facing you, make x=10,30,50,70 valley folds and x=20,40,60 mountain folds. Both strips must have the same sequence. The narrow solid bands beside the four valleys identify joints; they are not extra cuts.
Match each valley to a layer
L1 joins valley 10, L2 joins 30, L3 joins 50 and L4 joins 70 on both strips. Bring the folded valley against the back of its layer near the left or right outside edge. Use the narrow 2 mm band on either side of that valley for the joint. Keep the folds clear of the window and the layer’s bottom edge level with the strip’s bottom.
Hold the stack open before gluing
Start with layer planes roughly 10 mm apart, about 30 mm from L1 to L4. The paper path between neighbouring attachment valleys is 20 mm, so a 10 mm separation is geometrically possible. It is a suggested display setting, not a verified finished depth. Make sure both sides open equally and the layers stay parallel. The bellows may protrude beside the frame.
Glue a few joints at a time
First test glue on spare paper. Use a thin line along the joint bands, attach one layer at a time on both sides, and wait according to the adhesive label. Avoid wetting the window frames. Once dry, stand the scene on a flat surface and view it through L1. If it twists or collapses, record the failed joint or paper choice before changing the design.
Two paper sizes. The same little bookshop.
A4 is 210 × 297 mm; US Letter is 215.9 × 279.4 mm. The four editions retain 120 × 100 mm layer outlines, the same three windows, two 80 × 100 mm strips and seven 10 mm fold intervals. Digital vector comparisons verify equal pattern sizes; ink-saving removes colored fills. This comparison says nothing about a printer’s scaling or the model’s physical strength.
The physical checks still to do.
- Printed scale, clean cuts and matching left/right fold positions.
- Paper thickness and folds after repeated opening, without tearing.
- Glue adhesion after drying and whether the frames stay flat.
- Standing stability, shelf visibility and real shadows at the chosen depth.
- Photographs from the front and side, plus a note of every correction.
No physical model or user trial was produced in this digital release. Do not substitute the preview for these checks.
Before you print
Does Letter shrink the pieces?
No. The Letter layout retains the same millimetre dimensions. Print at 100% and verify the 50 mm lines.
Which lines should I cut?
Only the bold outside rectangles and three windows. Dashed side-strip lines are folds; fine artwork and joint-band marks stay intact.
Has the bookshop been physically tested?
No. It is an original, digitally checked design prototype. Folding, gluing and standing stability remain untested.